Wednesday, December 31, 2014

Refinement on temporary control design and inserting game graphic.

After able to control and play the game is time to create and insert some graphic into the website so is able to slightly enhance the experience a tiny little bit. ( for your information this is still not the final finishing design) 


This is the main page the graphic are created by illustrator. I had share some of the graphic in the previous blog.

This is the interface for the controller. Basically the design are main code with CSS styling, which turn out so welcoming.

The plane and the enemy ship are also design in adobe illustrator and the time and score were just decorated with CSS styling.

Tuesday, December 30, 2014

Work in Progress ( add button and control)

After getting the circle as the prototype . I start to test how to move the object to move in different direction. because of using mobile as controller i cannot use keycode to control the object i need to use button to send data to server. when the server received the data then the object with base on the code.

Below is how i key in the button, when on click it will trigger the javascript and send a code to the server.


Below is the javascript to send data to the server, when the button left is being trigger it will send "a" to the server.


Below is the javascript on the received end of the code which is also the display html, which mean when the code "a" had be received this code will trigger and the function left will be trigger.

When the function left be trigger, the object x will -2; same go to different direction.

Below is a video example to show how it work.


I used firebug to check the data that being send and received after trigger the button.

to download go to the link below:
http://getfirebug.com/releases/lite/chrome/


References

Getfirebug.com,. 'Firebug Lite For Google Chrome : Firebug'.  [online] Available at:http://getfirebug.com/releases/lite/chrome/[Accessed 23 Dec. 2014].

Monday, December 29, 2014

Countdown Timer

For my game i need to create a timer to just let the user play for a limited time. since this project is just to let user know about the technology and experience how fantastic it will be that we are able to control and interact with our personal mobile devices.

While searching online to find how to create a timer with java script, I was guide to this specific website from Google.

From this website i am able to copy and modified my personal timer from here. As always i am will start in new working files to test is it the code i want then only bring in to my actual working files.

I am going make my game duration around 1 minute to 1 minute 30 seconds, so for var i use 90 then the var minutes = Math.round(second-30)/60 with round out to the time i want then when it is being trigger it will minus when it reach 0:00 the will stop the timer and show the player they had win the game.


This is the code in html inside body. 

And i code style the CSS to make it appear like the image below.


So that is how i get my game timer.


References
Phpjabbers.com,. 'Javascript Countdown Timer | Javascript Tutorial'.  [online] Available at:http://www.phpjabbers.com/javascript-countdown-timer-php46.html [Accessed 29 Dec. 2014].

Sunday, December 28, 2014

Creating Background Sound and Sound Effect


I got my background sound effect from this website (http://strongholdgames.com/time-n-space-soundtrack/ ) which allow user to download for free. As this is a student project, i wish that by using this sound effect will not bring me any plagiarism issue. 

I download the sound track then bring in to Adobe Audition to edit and make it able to loop . 

Sound effect

I download my game sound effect from the 80 games space invaders game sound effect which i found from this website (http://www.classicgaming.cc/classics/spaceinvaders/sounds.php). Basically i downloaded the shooting sound and the explosion sound effect.

Reference

Classicgaming.cc,. 'Classic Arcade Games - Space Invaders'. [online] Available at:http://www.classicgaming.cc/classics/spaceinvaders/sounds.php  [Accessed 5 Feb. 2015.]

Strongholdgames.com,. 'Stronghold Games » Time ‘N’ Space – Soundtrack!'.[online] Available at: http://strongholdgames.com/time-n-space-soundtrack/  [Accessed 5 Feb. 2015.]

Friday, December 26, 2014

Work in Progress. (HTML5 Game)

After getting the connection to send data from mobile browser to computer browser, I am able to create a communication chat room. During the holiday i start to research on how to create the games structure. As i had propose in my presentation and proposal, i am going to create a space shooting games.

So i start to search on tutorial how to create a game with HTML5 canvas, since my connection is base on internet browser is good to create the game with HTML. I saw a few tutorial online but this is the one the suited me the best. So i follow the the tutorial that are separated into 5 part to create a sample so when i want to create my game is can modify from this sample.

The tutorial was share by Steven Lambert in http://blog.sklambert.com/, which is site that developer and programmer share their knowledge. (Personally, i will recommend for people who want to know more about coding can try visit this site.)

For this game we will be creating on canvas. First, open any software that you are suitable with to code a website.

Part 1 : Panning the background

HTML
We will start with the html page. Create a background for canvas and style it with CSS.
Javascript
The we will be focusing on the javascript code. As the tutorial we had 5 part in part 1 we be creating the background and pan the background to create the plan is always moving forward. For the code you can get it here.
References


Lambert, S. (2012). HTML5 Canvas Game: Panning a Background - Programming Tutorials, Tips, and Tricks. [online] Blog.sklambert.com. Available at: http://blog.sklambert.com/html5-canvas-game-panning-a-background/ [Accessed 22 Dec. 2014].


Part 2 : The Player

After Part 1 : Panning the background, we will continue on the coding on creating the player which is the spaceship. in this tutorial will create the control key and shooting bullet.

HTML
As always we will start with the html pages by adding canvas to store the player and css style to position the canvas.

Javascript
Then we will be focusing on the javascript codes. For the second part of the tutorial we are going to focusing on creating the spaceship by calling the spaceship image in the img folders then assigned the keyboard keycode to control the spaceship to move up, down, left and also right. After then we will also create the bullet and shooting function for the spaceship. Below are the code and explanation on every section of the code.  For the code you can get it here.

References

Lambert, S. (2012). HTML5 Canvas Game: Moving with Dirty Rectangles - Programming Tutorials, Tips, and Tricks. [online] Blog.sklambert.com. Available at: http://blog.sklambert.com/html5-canvas-game-the-player-ship/ [Accessed 22 Dec. 2014].


Part 3 : The Enemy Ships

In Part 3 we will be focus on the javascript, there are no changes in the HTML section.

Javascript
In this part we will focusing on how to create the enemy ships and the bullet the will shooting out. In this section, the code will be more tricky since the oare much condition need to be careful with like how many enemy bullets will be shooted out by the enemy ships. Beside that , which are the are they will be appear. And this part we will focusing on the section of the code. For the code you can get it here.

References

Lambert, S. (2013). HTML5 Canvas Game: The Enemy Ships - Programming Tutorials, Tips, and Tricks. [online] Blog.sklambert.com. Available at: http://blog.sklambert.com/html5-canvas-game-the-enemy-ships/ [Accessed 22 Dec. 2014].


Part 4 : 2D Collision Detection

In Part 4 we also will be focus on the javascript, there are no changes in the HTML section.

Javascript
In this part we will focusing on when the the player shoot and hit enemies will now results in the enemy disappearing. For the purposes of this demonstration, your ship will not disappear when you get hit by an enemy bullet. It now implements 2D collision detection fairly quickly. it is also a good technique for helping speed up collision detection by implementing a quadtree to reduce collision checks. For the code you can get it here.

References

Lambert, S. (2013). HTML5 Canvas Game: 2D Collision Detection - Programming Tutorials, Tips, and Tricks. [online] Blog.sklambert.com. Available at: http://blog.sklambert.com/html5-canvas-game-2d-collision-detection/ [Accessed 22 Dec. 2014].


Part 5 : 2D Collision Detection

In Part 5, we will focus on the finishing touches to our game such as sound, score, and a game over screen.

HTML
We’ll start out this tutorial by adding the player score and the game over screen. Both are done by modifying the HTML page.

Javascript
In this part we will focusing adding the player score, sound effect and the game over screen. Beside that as in part 4 we notice that the player will not get any effect after getting shooted by the enemy ship. We will adding this condition in the javascript coding as well. After you lose in the game, we provide a restart button, for player to restart the games. For the code you can get it here.

References
Lambert, S. (2013). HTML5 Canvas Game: HTML5 Audio and Finishing Touches - Programming Tutorials, Tips, and Tricks. [online] Blog.sklambert.com. Available at: http://blog.sklambert.com/html5-canvas-game-html5-audio-and-finishing-touches/ [Accessed 22 Dec. 2014].


Each part had it on tutorial which is well link the section, this is just one of the tutorial i use to create my mock up of my games. Since i had no much knowledge of canvas by doing practice it allowed me to understand more about the programming codes.


For those they will like to apply this code you are able to head to this two sites.


1) http://blog.sklambert.com/html5-canvas-game-panning-a-background/


The full set of the codes are uploaded in github. Feel free to download and play with the codes.

2) https://github.com/straker/galaxian-canvas-game


All the code are assign with description on every lines of codes . Due to this is not the code i create i will cite this code to Steven Lambert. and a special thank for sharing such useful tutorial online. For more reading can go in the sharing site which i had cite on the references in the end of the blog.

References

Lambert, S. (2012). HTML5 Canvas Game: Panning a Background - Programming Tutorials, Tips, and Tricks. [online] Blog.sklambert.com. Available at: http://blog.sklambert.com/html5-canvas-game-panning-a-background/ [Accessed 22 Dec. 2014].

Lambert, S. (2012). HTML5 Canvas Game: Moving with Dirty Rectangles - Programming Tutorials, Tips, and Tricks. [online] Blog.sklambert.com. Available at: http://blog.sklambert.com/html5-canvas-game-the-player-ship/ [Accessed 22 Dec. 2014].

Lambert, S. (2013). HTML5 Canvas Game: The Enemy Ships - Programming Tutorials, Tips, and Tricks. [online] Blog.sklambert.com. Available at: http://blog.sklambert.com/html5-canvas-game-the-enemy-ships/ [Accessed 22 Dec. 2014].


Lambert, S. (2013). HTML5 Canvas Game: 2D Collision Detection - Programming Tutorials, Tips, and Tricks. [online] Blog.sklambert.com. Available at: http://blog.sklambert.com/html5-canvas-game-2d-collision-detection/ [Accessed 22 Dec. 2014].


Lambert, S. (2013). HTML5 Canvas Game: HTML5 Audio and Finishing Touches - Programming Tutorials, Tips, and Tricks. [online] Blog.sklambert.com. Available at: http://blog.sklambert.com/html5-canvas-game-html5-audio-and-finishing-touches/ [Accessed 22 Dec. 2014].


Lambert, S. (2014). straker/galaxian-canvas-game. [online] GitHub. Available at: https://github.com/straker/galaxian-canvas-game [Accessed 22 Dec. 2014].

Wednesday, December 24, 2014

Work in Progress (button user experience)

After i create the button for to move the object left and right . but every move need to press the button once which make the game very hard to control so i research on how to make the button detect on hold when the button click is on hold the object can keep moving. My tutor share a tutorial with about using initial which is normally use for time event. at this section we are using time to detect the button is onhold or onclick. so when onhold the digi will continue increase and decrease.


This is an example video of the code work.


There is a difference between this code and my code. The example is direct sending the data in the same html but for my situation i will need to make the button when onhold will continuously sending the same data which i still working to solve it. beside this, onhold doesn't work for mobile device since most of the device is touch screen which is another section i need to solve to finish the games. Hopefully my next blog entry i am able to share how i solve all this problems.

References

Stackoverflow.com, (2014). How do I implement press and hold button javascript?. [online] Available at: http://stackoverflow.com/questions/702165/how-do-i-implement-press-and-hold-button-javascript [Accessed 24 Dec. 2014].


Work in Progress

Design character and digitalize and add color.

After sketching my my character and element that i need i started to put in color. Base on previous assignment i personally think that my art scenes in color is kinda weak so i get some reference online to help me on create a better color and also the lighting, gradient and reflection.


I base on sparrow to create my character and refer on some color in my references to create my main character.


Below is my landing page . still lack of some detail will be adding more shadow and tone to make it more attracting .


As for the enemy spaceship i still need to work on it more . below are some sample i did but personally i will like to redo one the enemy spaceship.

References

References

Pinterest,. 'Dune'. N.p., 2015 [online] Blog.sklambert.com. Available at: https://www.pinterest.com/pin/265079128042721891/ [Accessed 24 Dec. 2014].
The Gundam Wiki,. 'ZGMF-X56S/Α Force Impulse Gundam' [online] Blog.sklambert.com. Available at: http://gundam.wikia.com/wiki/ZGMF-X56S/%CE%B1_Force_Impulse_Gundam[Accessed 24 Dec. 2014].
Winterhillwargamers.myfreeforum.org,. 'Winter Hill Wargamers :: Cyberpunk Models'. [online] Blog.sklambert.com. Available at: http://winterhillwargamers.myfreeforum.org/Cyberpunk_Models_about154.html [Accessed 24 Dec. 2014].


Monday, December 22, 2014

Project Feedback and Project outcome form signed off.


During semester break, i received a email from my lecturer Sweii Chong comment on the our assignment. Base one the email, the lecturers and supervisor worries about the all the work i need to handle and afraid that i am not able to to finish it on time. So base the information i had and the possibilities of my project i had decide to create only one which is the multiple players spaceship shooting games.

So during the Project outcome signed off, i had explained to Sweii about my decision and prepared my final project outcome to Sweii Chong to signed off. The images below are the print screen of my final project outcome .


Friday, December 19, 2014

Guest Visit ( Mr.Stuart Godwin From Cheil Malaysia)

Week 7 Guest Review on Final Project 
Guest : Mr Stuart Godwin from Cheil Malaysia
Location: IIS


Our class was so lucky that we are able to showcase our project to some professional in the industry to get a better review on our final project. Sweii was able to invite Mr. Stuart Godwin from Cheil Malaysia as our guest to review our project. Me and of the classmate set up our project in IIS and some was set in normal classroom.

I start to present my work around 430pm, I start to explain what am i doing, which is using Socket to connect to computer browser and mobile browser to create an interaction beyond just using normal control such mouse and keyboard. During that stage i was quite behind the schedule due to troubleshooting and debug take quite a long compare to what i expected.

So during that day i am only be able to show the simple control like moving the ship with button to control the direct. Pressing start to trigger the game. That was pretty much what i had. Most of the concept and idea was just me explained with word. 

Comment from the guest:
  1. Is it an interesting idea, using such technology to create interaction and contents.
  2. Is hard to imagine the game play without the game there. But from what you explain i can slightly imagine.
  3. When you are able to control, it will be fine. Try work out on the game structure. Then only start to debug and enhance the experience.
  4. About the game play, how both player interact with each other. Are them shooting each other. What is their objective or what is the objective on having two player.
Although, i didn't have much content to review, but Mr, Godwin also gave me also of suggestion and pin pointed the area i need to focus on. I was quite happy that he found my project interesting. Base on the comment and suggestion i list down a work list that i need to complete in the coming study break.

  1. I need to work the progress of the game structure. Create the game out. So during the next guest review will had better and more solid data from the guest.
  2. Figure out what i can do to make the game more fun. Adding Score and time limit so both player can compete with each other with score.
  3. Will be adding in narrative story before the game start so user had a better idea what their game objective is. For example, both of the players are the chosen one to safe the earth by the invasion of the alien.
Is was my pleasure to had an industry professional to look at my work, it was a cool experience and it do help me to understand what can be improve.


Friday, December 12, 2014

Consultation (12/12/14)

I was able to create the button and control the canvas but only one of the circle. In this week consultation i want to make another circle to be able to move . I brought my code to class and show Yee Siang my progres. Basically we run through the code and done debug to double confirm the code. Yee Siang always say when you publish it work mean it work already.

While consulting with Yee Siang i was able to find out a way to create my code. So Yee Siang and agree to make another set of control for another user. Which mean separated control for different player. Since the following in the guest review, i need to insert is some graphic after finish the debugging the code.

I realized that while discussing with people i am able to thinking faster and able to learn more, which help my programming process faster.

Saturday, December 6, 2014

Consultation Ye Siang (5/12/2014)

In this week consultation , it was very sad that i had not much progress cause i am stuck between codes and programming language. As i had launch my files to show the error and stuff. Yee Siang saw on the structure of the code and just asked me to  start all over again by creating the canvas myself. So for the next week i will be creating and cample with just simple shape color and css styling only. The graphic will add-on when the design are done the final installation coding.

I regret that i  didn't prepare enough today so the comment and action is unable to fill. For theses coming week i will try my best to create a two object canvas to let the staff and worker stuff before our final exhibition.

Friday, November 28, 2014

Consultation Yee Siang (28/11/2014)

After last week tutorial, I went back to create and try very hard to connect it with the mobile web-socket, So ask always, is time to debug and fixing error. While i am creating the button and asking on on how to control the ship with different button. Yee Siang ask me to start from basic again. He show me some tutorial online the help me to connect with the socket and didn't come out error. After when the code is ready, Yee Siang ask me that next the will like to see another characters move. If it is happening means miracle. So during this i need to go did more research how to control a character by clicking on button.

I kind of use back the memory and notes that i had take down to finis this project so that we are able to finish on time.

Friday, November 21, 2014

Consultation Yee Siang ( 21/11/2014)


In the consultation with Yee Siang is always about debugging code and solving error. This time still the same issue.

I had created the button as a control to move the canvas object and try to create another shape but fail. While we are debugging we also discuss about the user flow and how people should connect to the server.

The code was able to be solve and will post in the different blog post. As we are discuss, i need to assign the player to different character. Like when scan the code the will a specific character for the user. And it will be a first come first serve method. while user log in to the server different mobile will need to send different data to the dedicated space ship they are control which will be my next step to create my coding for my final installation.

I was pretty glad that i start creating the socket last semester if not i should be do the web-socket now.

I was also ask to try create the code with simple canvas first before going to the main code because this will affect the previous code and also make me confuse.

Thursday, November 20, 2014

Consultation 19/11/2014


During the tutorial we were discussing about the interface and character design that i had sketch and lastly the tutorial section for user to understand the game play.

1) base on the commend from Yi Wei, tutorial is basically up to the game play. Maybe this game is new and the structure is complicated then will be good that had tutorial but if it is a game that we normal will play then just keep it simple with the tutorial.

2) for the character design. In the sketch there are a lot different type of character. Different character need different abilities which mean more condition and game need to be plan. Then YiWei ask me whether i am focusing on the game play or the web socket. If it is just socket then just create a simple game but try to enhance with some narrative element.

3) Two player had a lot possibilities like what i discuss during the meeting. Maybe like two plan is overlay then got super power and so on.

Base on the comment i try to summarize and go back to my objective of the project. I rethink what is my object and i decide that i am focus on the socket more. So i decide to create a simple multiplier shooting game to present the technology.

I will just create one type of plane and a type of enemy create a simple shooting score competing game.

Due to i am using html the difficulties in programming had raise up. Wish me all the best.

Tuesday, November 18, 2014

WIP (sketches and character design)

I had to create some sketches for my characters and also the logo for my landing pages. As you can at the bottom is the images of my sketches the three on the top is the main characters space as i had plan each of them have different abilities. As for the bottom three is the enemy spaceship, base and the look of the spaceship different kind had different abilities. 

I had given them a name , lightning the top right is the speed type of spaceship attack weak but fast shooting and movement to dodge attack. The booster (under lightning) , huge armor , mean strong defence high attack but very slow speed. and for main character is the wing, the most average spaceship.

As for the enemy, top one is the enemy that will be fly in zig zag formation. The round one is just a normal enemy spaceship , and the one at the left is a special spaceship which move fast and when player hit will get higher points.


Base on the game that i will like to create i come out a list of condition and schedules or sequence that i will like to use to create my games. Base on the understand, i create all the steps that guide to create the games. And base on the list i will be able to check the area that i need to put more attention and effort to finish the games design.


Work in production (coding the canvas)

I show the prototype of the html5 games that i follow base on the tutorial to Yee Siang, my supervisor on programming my final project. Although he say is a good source but he advise me to start from draft again, and code it myself. I can reference back the code but don't use fully on the code because the control and sending information progress is different.

As we all know that base on my previous blogspot, i am creating my display and control in two different HTML. For this canvas i am creating in the display html. 

So i start again by creating canvas. So i start with javascript to create a canvas and also code in a round object in the canvas to represent the character.


After creating the canvas in javascript, i go to the html source code to link the javascript with the html files and add in the canvas to display the canvas in the html page when it is being publish.


Due to my game is multiple players so i need to add in another player to so in the javascript i will be adding another shape to represent the another player.


If there are not mistake, when you display on browser you will see something like the images below.


References
W3schools.com,. 'HTML5 Canvas'. [online] Available at: http://stackoverflow.com/questions/702165/how-do-i-implement-press-and-hold-button-javascript [Accessed 23 Dec. 2014].


Friday, August 22, 2014

WebSocket Server & Mobile Client

Although i successfully using socket io to create a chatroom that able to let few computer to communicate but only computer that have node js are able to use the chatroom but that is not the connection i will like to have for my project. So me and tutor yee siang and jam who both are the professional in this industry sit down in the lab and try to figure out the possibility of fixing. Yee siang and jam did mention this is some like computer science level already so even them also need some research only can fix it. At that point i almost gave up and think i will fail my final year project but luckily Yee Siang are able to solve the problem. That night after the 2 hours meeting, Yee Siang tag in a facebook post, which is a tutorial he created to base on the problem i had . He said that when research on this area not body had share the solution. Just part and part, then he straight away combine the code and create a free source tutorial to share his tutorial.

So basically there are are few step need to beware of compare to our last time tutorial.

here is the link that send to me by my lecturer : http://tech.yeesiang.com/websocket-server-mobile-client/. if you are interested to this code can try to subscribe the blog.(yee siang i help you promote your blog. LOL )

You require to download Xampp, Node.js

To create the server you need to follow this few steps.

First, you need to have nodejs installed.
Save the code below into websock-server\index.js
Then, in your terminal/cmd, type npm install websocket@1.0.3 to install the nodejs websocket library.


Make sure your port 8080 is not occupied by other program as I am using port 8080 in this example.


Next, in your terminal/cmd, cd into the folder and type node index.js

var
http = require('http');
var server = http.createServer(function(request, response) {
    console.log((new Date()) + ' Received request for ' + request.url);
    response.writeHead(404);
    response.end();
});
server.listen(8080, function() {
    console.log((new Date()) + ' Server is listening on port 8080');
});
wsServer = new WebSocketServer({
    httpServer: server,
    // You should not use autoAcceptConnections for production
    // applications, as it defeats all standard cross-origin protection
    // facilities built into the protocol and the browser.  You should
    // *always* verify the connection's origin and decide whether or not
    // to accept it.
    autoAcceptConnections: false
});
function originIsAllowed(origin) {
  // put logic here to detect whether the specified origin is allowed.
  return true;
}
var connections = {};
var connectionIDCounter = 0;
    
wsServer.on('request', function(request) {
    if (!originIsAllowed(request.origin)) {
      // Make sure we only accept requests from an allowed origin
      request.reject();
      console.log((new Date()) + ' Connection from origin ' + request.origin + ' rejected.');
      return;
    }
    //var connection = request.accept('kraken-protocol', request.origin);
    var connection = request.accept(null, request.origin);
    connection.id = connectionIDCounter ++;
    connections[connection.id] = connection;
    
   console.log((new Date()) + ' Connection ID ' + connection.id + ' accepted.');
    
    connection.on('message', function(message) {
        if (message.type === 'utf8') {
            console.log('Received Message: ' + message.utf8Data);
            //connection.sendUTF(message.utf8Data);
            broadcast(message.utf8Data)
        }
        else if (message.type === 'binary') {
            console.log('Received Binary Message of ' + message.binaryData.length + ' bytes');
            connection.sendBytes(message.binaryData);
        }
        
    });
    
    connection.on('close', function(reasonCode, description) {
        console.log((new Date()) + ' Peer ' + connection.remoteAddress + ' disconnected. '+"Connection ID: " + connection.id);
        // Make sure to remove closed connections from the global pool
        delete connections[connection.id];
    });
});
// Broadcast to all open connections
function broadcast(data) {
    Object.keys(connections).forEach(function(key) {
        var connection = connections[key];
        if (connection.connected) {
            connection.send(data);
        }
    });
}
// Send a message to a connection by its connectionID
function sendToConnectionId(connectionID, data) {
    var connection = connections[connectionID];
    if (connection && connection.connected) {
        connection.send(data);
    }
}

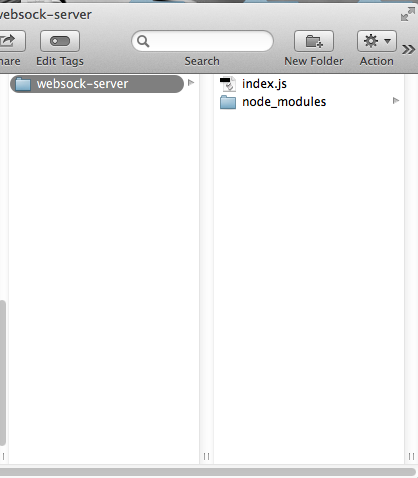
Save then you will see this in your folder

This is able to use as server. Is user a output screen . Every time when people log in or out will have update. Then everything when people key in message it automatically update on the page.

After create the server we need to create the client files.

For the client part, the tutorial ask to going to create 2 interface, one for sending and receiving chat msg (index.htm), another for receiving chat msg only (logger.htm) which is the display.

You will need to change the Server IP in it into yours (ws://192.168.0.200:8080)

So now i can open the index.htm and type a msg, and it will appear on the space below the input box, as well as in logger.htm

I can even put index.htm into phonegap (need to provide option for user to enter the Server IP) and it can serve as a ‘controll’ while logger.htm can be modified to be a ‘receiver’ which also know as a "output".

Put the two files in the websock-client folder


index.htm source code
<head>
    <title>Node Based Echo</title>
    <script src="js/jquery-1.6.2.min.js" type="text/javascript"></script>
    <script src="js/jquery.websocket-0.0.1.js" type="text/javascript"></script>
    <script src="js/jquery.json.min.js" type="text/javascript"></script>
</head>
<body>
    <script type="text/javascript">
        // sends a message to the websocket server
        function sendToServer() {
            ws.send('say', '{ messageTextA: ' + $('#echoText').val() + ' }');
            //ws.send('krakenmsgB', '{ messageTextB: ' + $('#echoText').val() + ' }');
        }
        // set-up web socket
        var ws = $.websocket("ws://192.168.0.200:8080/", {
            open: function () { },
            close: function () { alert('websocket has been closed'); },
            events: {
                say: function (e) { $('#returnText').append(e.data + "<br/>"); },
            }
        });
    </script>
    <div>
        <div style="float: left; clear: left; padding-top: 2px;">
            Your text:
        </div>
        <div style="float: left; padding-left: 20px;">
            <input type="text" id="echoText" style="width: 150px;" required />
        </div>
        <div style="clear: left;">
            <input type="button" onclick="javascript:sendToServer();" value="Send" />
        </div>
        <div id="returnText" style="clear: left; height: 200px; padding-top: 30px;">
        </div>
    </div>
</body>
</html>

Then logger.htm source code

<html lang="en"> <head> <title>Logger</title> <script src="js/jquery-1.6.2.min.js" type="text/javascript"></script> <script src="js/jquery.websocket-0.0.1.js" type="text/javascript"></script> <script src="js/jquery.json.min.js" type="text/javascript"></script> </head> <body> <script type="text/javascript"> // set-up web socket var ws = $.websocket("ws://localhost:8080/", { open: function () { }, close: function () { alert('websocket has been closed'); }, events: { say: function (e) { $('#returnText').append(e.data + "<br/>"); }, } }); </script> <div> <div id="returnText" style="clear: left; height: 200px; padding-top: 30px;"> </div> </div> </body> </html>

To try it  copy the websock-client files into xampp htdocs first so that phone are able to connect to the folder to internet database.


Start xampp first before launch in browser. and also terminal as well .

So this will be how it will look like