Although i successfully using socket io to create a chatroom that able to let few computer to communicate but only computer that have node js are able to use the chatroom but that is not the connection i will like to have for my project. So me and tutor yee siang and jam who both are the professional in this industry sit down in the lab and try to figure out the possibility of fixing. Yee siang and jam did mention this is some like computer science level already so even them also need some research only can fix it. At that point i almost gave up and think i will fail my final year project but luckily Yee Siang are able to solve the problem. That night after the 2 hours meeting, Yee Siang tag in a facebook post, which is a tutorial he created to base on the problem i had . He said that when research on this area not body had share the solution. Just part and part, then he straight away combine the code and create a free source tutorial to share his tutorial.
So basically there are are few step need to beware of compare to our last time tutorial.
here is the link that send to me by my lecturer :
http://tech.yeesiang.com/websocket-server-mobile-client/. if you are interested to this code can try to subscribe the blog.(yee siang i help you promote your blog. LOL )
You require to download Xampp, Node.js
To create the server you need to follow this few steps.
First, you need to have nodejs installed.
Save the code below into websock-server\index.js
Then, in your terminal/cmd, type npm install websocket@1.0.3 to install the nodejs websocket library.

Make sure your port 8080 is not occupied by other program as I am using port 8080 in this example.
Next, in your terminal/cmd, cd into the folder and type node index.js
var http = require('http');
var server = http.createServer(function(request, response) {
console.log((new Date()) + ' Received request for ' + request.url);
response.writeHead(404);
response.end();
});
server.listen(8080, function() {
console.log((new Date()) + ' Server is listening on port 8080');
});
wsServer = new WebSocketServer({
httpServer: server,
// You should not use autoAcceptConnections for production
// applications, as it defeats all standard cross-origin protection
// facilities built into the protocol and the browser. You should
// *always* verify the connection's origin and decide whether or not
// to accept it.
autoAcceptConnections: false
});
function originIsAllowed(origin) {
// put logic here to detect whether the specified origin is allowed.
return true;
}
var connections = {};
var connectionIDCounter = 0;
wsServer.on('request', function(request) {
if (!originIsAllowed(request.origin)) {
// Make sure we only accept requests from an allowed origin
request.reject();
console.log((new Date()) + ' Connection from origin ' + request.origin + ' rejected.');
return;
}
//var connection = request.accept('kraken-protocol', request.origin);
var connection = request.accept(null, request.origin);
connection.id = connectionIDCounter ++;
connections[connection.id] = connection;
console.log((new Date()) + ' Connection ID ' + connection.id + ' accepted.');
connection.on('message', function(message) {
if (message.type === 'utf8') {
console.log('Received Message: ' + message.utf8Data);
//connection.sendUTF(message.utf8Data);
broadcast(message.utf8Data)
}
else if (message.type === 'binary') {
console.log('Received Binary Message of ' + message.binaryData.length + ' bytes');
connection.sendBytes(message.binaryData);
}
});
connection.on('close', function(reasonCode, description) {
console.log((new Date()) + ' Peer ' + connection.remoteAddress + ' disconnected. '+"Connection ID: " + connection.id);
// Make sure to remove closed connections from the global pool
delete connections[connection.id];
});
});
// Broadcast to all open connections
function broadcast(data) {
Object.keys(connections).forEach(function(key) {
var connection = connections[key];
if (connection.connected) {
connection.send(data);
}
});
}
// Send a message to a connection by its connectionID
function sendToConnectionId(connectionID, data) {
var connection = connections[connectionID];
if (connection && connection.connected) {
connection.send(data);
}
}
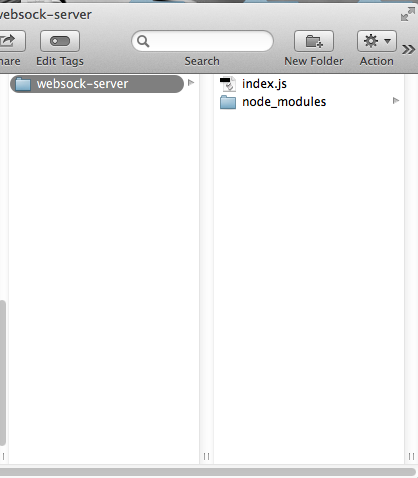
Save then you will see this in your folder
This is able to use as server. Is user a output screen . Every time when people log in or out will have update. Then everything when people key in message it automatically update on the page.
After create the server we need to create the client files.
For the client part, the tutorial ask to going to create 2 interface, one for sending and receiving chat msg (index.htm), another for receiving chat msg only (logger.htm) which is the display.
You will need to change the Server IP in it into yours (ws://192.168.0.200:8080)
So now i can open the index.htm and type a msg, and it will appear on the space below the input box, as well as in logger.htm
I can even put index.htm into phonegap (need to provide option for user to enter the Server IP) and it can serve as a ‘controll’ while logger.htm can be modified to be a ‘receiver’ which also know as a "output".
Put the two files in the websock-client folder
index.htm source code
<head>
<title>Node Based Echo</title>
<script src="js/jquery-1.6.2.min.js" type="text/javascript"></script>
<script src="js/jquery.websocket-0.0.1.js" type="text/javascript"></script>
<script src="js/jquery.json.min.js" type="text/javascript"></script>
</head>
<body>
<script type="text/javascript">
// sends a message to the websocket server
function sendToServer() {
ws.send('say', '{ messageTextA: ' + $('#echoText').val() + ' }');
//ws.send('krakenmsgB', '{ messageTextB: ' + $('#echoText').val() + ' }');
}
// set-up web socket
var ws = $.websocket("ws://192.168.0.200:8080/", {
open: function () { },
close: function () { alert('websocket has been closed'); },
events: {
say: function (e) { $('#returnText').append(e.data + "<br/>"); },
}
});
</script>
<div>
<div style="float: left; clear: left; padding-top: 2px;">
Your text:
</div>
<div style="float: left; padding-left: 20px;">
<input type="text" id="echoText" style="width: 150px;" required />
</div>
<div style="clear: left;">
<input type="button" onclick="javascript:sendToServer();" value="Send" />
</div>
<div id="returnText" style="clear: left; height: 200px; padding-top: 30px;">
</div>
</div>
</body>
</html>
Then logger.htm source code
<html lang="en">
<head>
<title>Logger</title>
<script src="js/jquery-1.6.2.min.js" type="text/javascript"></script>
<script src="js/jquery.websocket-0.0.1.js" type="text/javascript"></script>
<script src="js/jquery.json.min.js" type="text/javascript"></script>
</head>
<body>
<script type="text/javascript">
// set-up web socket
var ws = $.websocket("ws://localhost:8080/", {
open: function () { },
close: function () { alert('websocket has been closed'); },
events: {
say: function (e) { $('#returnText').append(e.data + "<br/>"); },
}
});
</script>
<div>
<div id="returnText" style="clear: left; height: 200px; padding-top: 30px;">
</div>
</div>
</body>
</html>
To try it copy the websock-client files into xampp htdocs first so that phone are able to connect to the folder to internet database.
Start xampp first before launch in browser. and also terminal as well .
So this will be how it will look like